How to Start Sewing Your Own Children's Clothes: A Beginner's Guide for Parents
Most parents who fancy making their child's clothes hit the same wall: patterns look complicated, fabric choices feel baffling, and the machine sitting in the corner seems to demand more skill than they have. The good news is that sewing children's clothes for beginners is genuinely one of the gentler ways into the craft. Kids' garments are small, built from simple shapes, and do not need high-fashion finishes to look lovely and feel comfortable on a moving, muddy, growing child.
This guide walks you from zero to a first finished garment. Along the way you will find out which tools actually matter, how to choose beginner-friendly fabrics and patterns, what a first project looks like step by step, and which basic techniques will carry you through most of what you make. The machine at the centre of it all is a reliable straight-stitch workhorse, and you will see why that is the sensible choice rather than a machine bristling with functions you will rarely use.
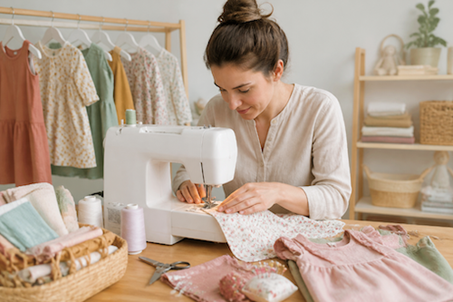
Why sewing your child's clothes is a realistic beginner project
The practical case for making children's clothes is straightforward. You choose the fabric, so you control how soft it feels against sensitive skin, how roomy the fit is, and whether it features the dinosaur print your four-year-old currently considers non-negotiable. You can also mend seams or let out hems rather than replacing items the moment they get worn or outgrown.
On cost, buying decent cotton fabric and a reel of elastic for a pair of trousers will often come close to buying a similar pair from a mid-range shop. The real value builds over time, because leftover fabric from one project becomes the lining for the next, and the skills you develop are reusable indefinitely. It is worth being honest about the learning curve, though. Your first make will take longer than you expect and the stitching will not be perfect, but that is completely fine, because children are not fussy about a slightly wobbly hem, and children's clothes are a forgiving place to practise precisely because the stakes are low.
Small scale is another genuine advantage. A pair of toddler trousers uses less than a metre of fabric, fits easily under the machine arm, and can be cut and sewn in a couple of evenings. Seeing a finished garment quickly is motivating, and motivation is what keeps beginners going long enough to get good.
The core kit you need, and why a straight-stitch machine is your best friend
The minimum kit for making children's clothes is shorter than most beginners expect. You need a pair of sharp fabric scissors kept only for fabric, pins or sewing clips, a tape measure, a fabric marker or tailor's chalk, a seam ripper (you will use it more than you think), a steam iron with an ironing board, and a few reels of thread in neutral colours such as navy, white, and grey. That is genuinely it to get started.
The machine matters most. When choosing a sewing machine as a beginner parent, ignore the number of decorative stitches and focus on a few practical qualities: a reliable, clean straight stitch; a motor strong enough to sew through two or three layers of cotton without slowing; simple controls that do not require a manual every time you sit down; clear bobbin access; and good lighting over the needle. Most simple woven children's garments, including trousers, skirts, pinafores, and pull-over tops, are constructed almost entirely with a straight stitch, which means a high-quality straight-stitch machine is not a compromise but the right tool for the job. Investing in a semi-industrial sewing machine from Juki is a good example of this kind of dependable workhorse: it produces neat, strong seams, handles layers without protest, and is fast enough that batch-sewing three pairs of shorts in a single evening session becomes entirely realistic.
A few optional extras are worth knowing about but are not essential on day one. Pinking shears or a basic zigzag setting can help finish raw edges to reduce fraying, and a small seam gauge is handy for checking even hems. A safety pin is the traditional tool for threading elastic through a waistband casing. Buy these as you need them rather than all at once.
Choosing beginner-friendly fabrics, patterns and styles
Fabric choice makes a bigger difference to the sewing experience than most beginners realise. For children's everyday clothes, look for soft, breathable, and washable woven fabrics: cotton poplin, cotton lawn, light chambray, and cotton flannel are all excellent starting points. These stable wovens do not stretch or slip under the presser foot, which makes cutting and straight stitching far easier than working with slippery or very stretchy knits. Cotton jersey is fine for casual tops once you are comfortable with the basics, but it behaves differently under the machine, so leave it for a second or third project.
For patterns, the label is your guide: choose anything marked 'beginner' or 'easy', and look for designs with a small number of pattern pieces and an elasticated waist. Clearly illustrated instructions matter far more than a low price, and it is worth choosing a pattern that covers a generous size range so you can reuse it as your child grows. In terms of style, elastic-waist trousers or shorts, simple gathered skirts, loose pull-over tunics, and pull-on pyjama bottoms are ideal first choices, because they rely almost entirely on straight seams and involve no fiddly fastenings.
Details to avoid at first include tiny collars, set-in sleeves, button plackets, zips, lots of curved panels, and newborn sizes with very small seam allowances that are harder to control. On prints, choose small or medium non-directional designs, meaning patterns with no obvious top or bottom. With a directional print you can accidentally cut pieces upside-down, which wastes fabric and time.
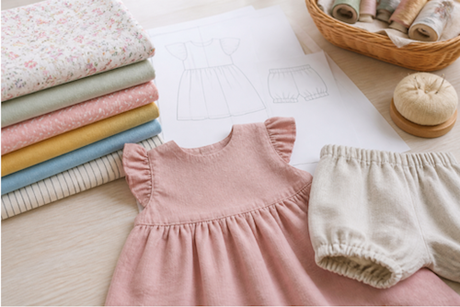
Your first project: elastic-waist trousers or shorts from cut to finish
Elastic-waist trousers or shorts are the ideal first garment. Here is how to work through one from start to finish.
1. Choose your size and cut the fabric. Measure your child's waist and height, then pick the pattern size that matches the waist even if the height is slightly different; you can adjust the leg length later. Trace or cut your pattern pieces, lay them on folded fabric following the grainline arrows, pin or clip them down, and cut slowly with sharp scissors.
2. Mark and prepare. Transfer key markings, such as front and back pieces, notches, and the elastic opening in the waistband, using tailor's chalk. Note the seam allowance printed on the pattern; 1.5 cm is common. Thread your machine with matching thread, fit a fresh needle suitable for woven cotton, and set a medium stitch length of around 2.5 mm.
3. Sew the leg seams. With right sides of fabric facing each other, stitch each leg's inner leg seam using the correct seam allowance. Press those seams open with the iron, then place one finished leg inside the other, right sides together, and sew the crotch seam in one smooth curve.
4. Form the waistband casing. Press the top edge over by about 1 cm, then fold and press again by the width of your elastic plus a little extra for ease. Stitch all the way around close to the lower folded edge using your straight-stitch machine, leaving a small gap of about 5 cm to insert the elastic.
5. Add the elastic. Cut a length of elastic to your child's actual waist measurement, minus a centimetre or two for a comfortable snug fit. Thread it through the casing using a safety pin attached to one end, overlap the elastic ends by about 2 cm, and sew them securely with several lines of straight stitch before closing the gap in the waistband seam.
6. Hem the legs. Try the trousers on the child or measure the inseam to find the right length. Press the hem up twice and stitch around with a straight stitch, keeping the fold aligned with a seam guide or a marked line on the machine bed for an even finish.
7. Final checks. Trim all loose threads, turn the garment inside out and run your fingers along the seams to check they feel smooth, then press the whole thing. Slight wobbles in stitching are fine; comfort and washability matter far more than perfection at this stage.
Essential techniques, safety and comfort for handmade kids' clothes
A seam allowance is the strip of fabric between your stitch line and the cut edge of the fabric. Keeping it consistent throughout a garment is what makes the pieces join up correctly and the final item fit as the pattern intended; if it drifts, the garment will end up slightly off in ways that are hard to correct later. Pressing each seam with a hot iron immediately after stitching it is one of the habits that makes the biggest visible difference, because it flattens and sets the stitch so everything lies smooth inside and out.
For seam strength, a standard straight seam pressed open works well for most areas. At higher-stress points such as the crotch and seat of trousers, use a slightly shorter stitch length of around 2 mm, or sew the seam twice for extra durability. Children sit, crawl, and climb in their clothes, and those seams take real strain. Finishing raw edges to prevent fraying is worth doing, too. If you have access to a machine with a zigzag stitch, run it along each cut edge after stitching the seam; pinking shears are a quick alternative.
Sizing and ease deserve a mention. Children need more room in their clothes than the measurements suggest, especially across the seat and thighs where they need to move freely. Follow the pattern's own measurements rather than relying on the age label, which varies widely between brands, and consider adding a little extra length to trouser legs or a deeper hem fold so the garment can be let down as the child grows.
On safety, avoid buttons, beads, decorative ties, and appliqués that could be pulled off and swallowed, particularly on clothing for children under three. Turn finished garments inside out before the child wears them and feel along every seam for lumps or scratchy edges; a seam that feels fine to you can be uncomfortable against a child's skin all day. For nightwear specifically, UK regulations require that certain flame-safety standards are met, either through close-fitting construction or through the use of suitable fabrics, and labelling rules apply. If you are new to sewing, the simplest approach is to focus on daywear first and research the nightwear regulations fully before making any pyjamas.
For care, choose fabrics that can be machine washed at a normal family temperature and use colourfast thread so the garment holds up to repeated laundering. Pre-washing and pressing your fabric before you cut it is essential, because cotton can shrink by several centimetres in the first wash, and you want that to happen before you cut your pattern pieces rather than after.
Building confidence: your next makes and how to keep momentum going
The single most effective thing you can do after your first pair of trousers is to make them again in a different fabric. The second time, cutting feels faster, your seam allowance stays steadier, and pressing becomes instinctive. The third time, you barely have to think about any of it. Repetition with the same simple pattern is how beginners become competent sewers, and children's wardrobes give you a genuinely useful reason to keep going.
Once elastic-waist garments feel comfortable, the natural next step is a simple gathered skirt or a loose pull-over dress. Both rely mainly on straight seams, so a Juki TL-series machine continues to handle almost all the work without any additional settings or attachments. The skills transfer directly, and the only new element is usually a slightly longer cutting list.
One practical habit that makes sewing fit around family life is to break the process into short sessions: pre-wash and press your fabric one evening, cut the next, and then sew in whatever windows you have. Keeping everything in one place, a small tub with your project fabric, pattern pieces, and notions together, means you can pick up where you left off without having to reconstruct your thinking each time.
A dependable straight-stitch machine removes a whole layer of complexity from the process. Fewer settings to manage means more attention available for the things that actually shape a good garment: fabric choice, consistent seam allowances, careful pressing, and fit. Start simple, repeat what works, and sewing your child's clothes quickly becomes one of the more satisfying things you can do on a weekday evening.